A 96 well plate template you can print blank or fill in
This 96 well plate template draws the standard grid of eight rows, A to H, and twelve columns, 1 to 12. Leave the groups box empty and you get a clean blank plate to print and annotate by hand. Add one line per group, such as "Standards: B1-H2", and the wells in that range are colored and listed in a legend with their well counts. The same editor draws 6, 12, 24, 48 and 384 well plates, so one page covers the usual microplate formats.
A range is written as two corners. A1-A12 is the whole first row, A1-H1 is the whole first column and B2-G11 is the inner block of sixty wells. Separate several ranges or single wells with commas. The editor checks every well against the selected format and refuses a layout in which one well belongs to two groups, so the picture cannot quietly disagree with your plan. Everything runs in your browser without an account or credits, and the plate downloads as SVG or PNG.
Examples you can inspect
Compare the supplied input, saved result and review points before preparing your own figure.
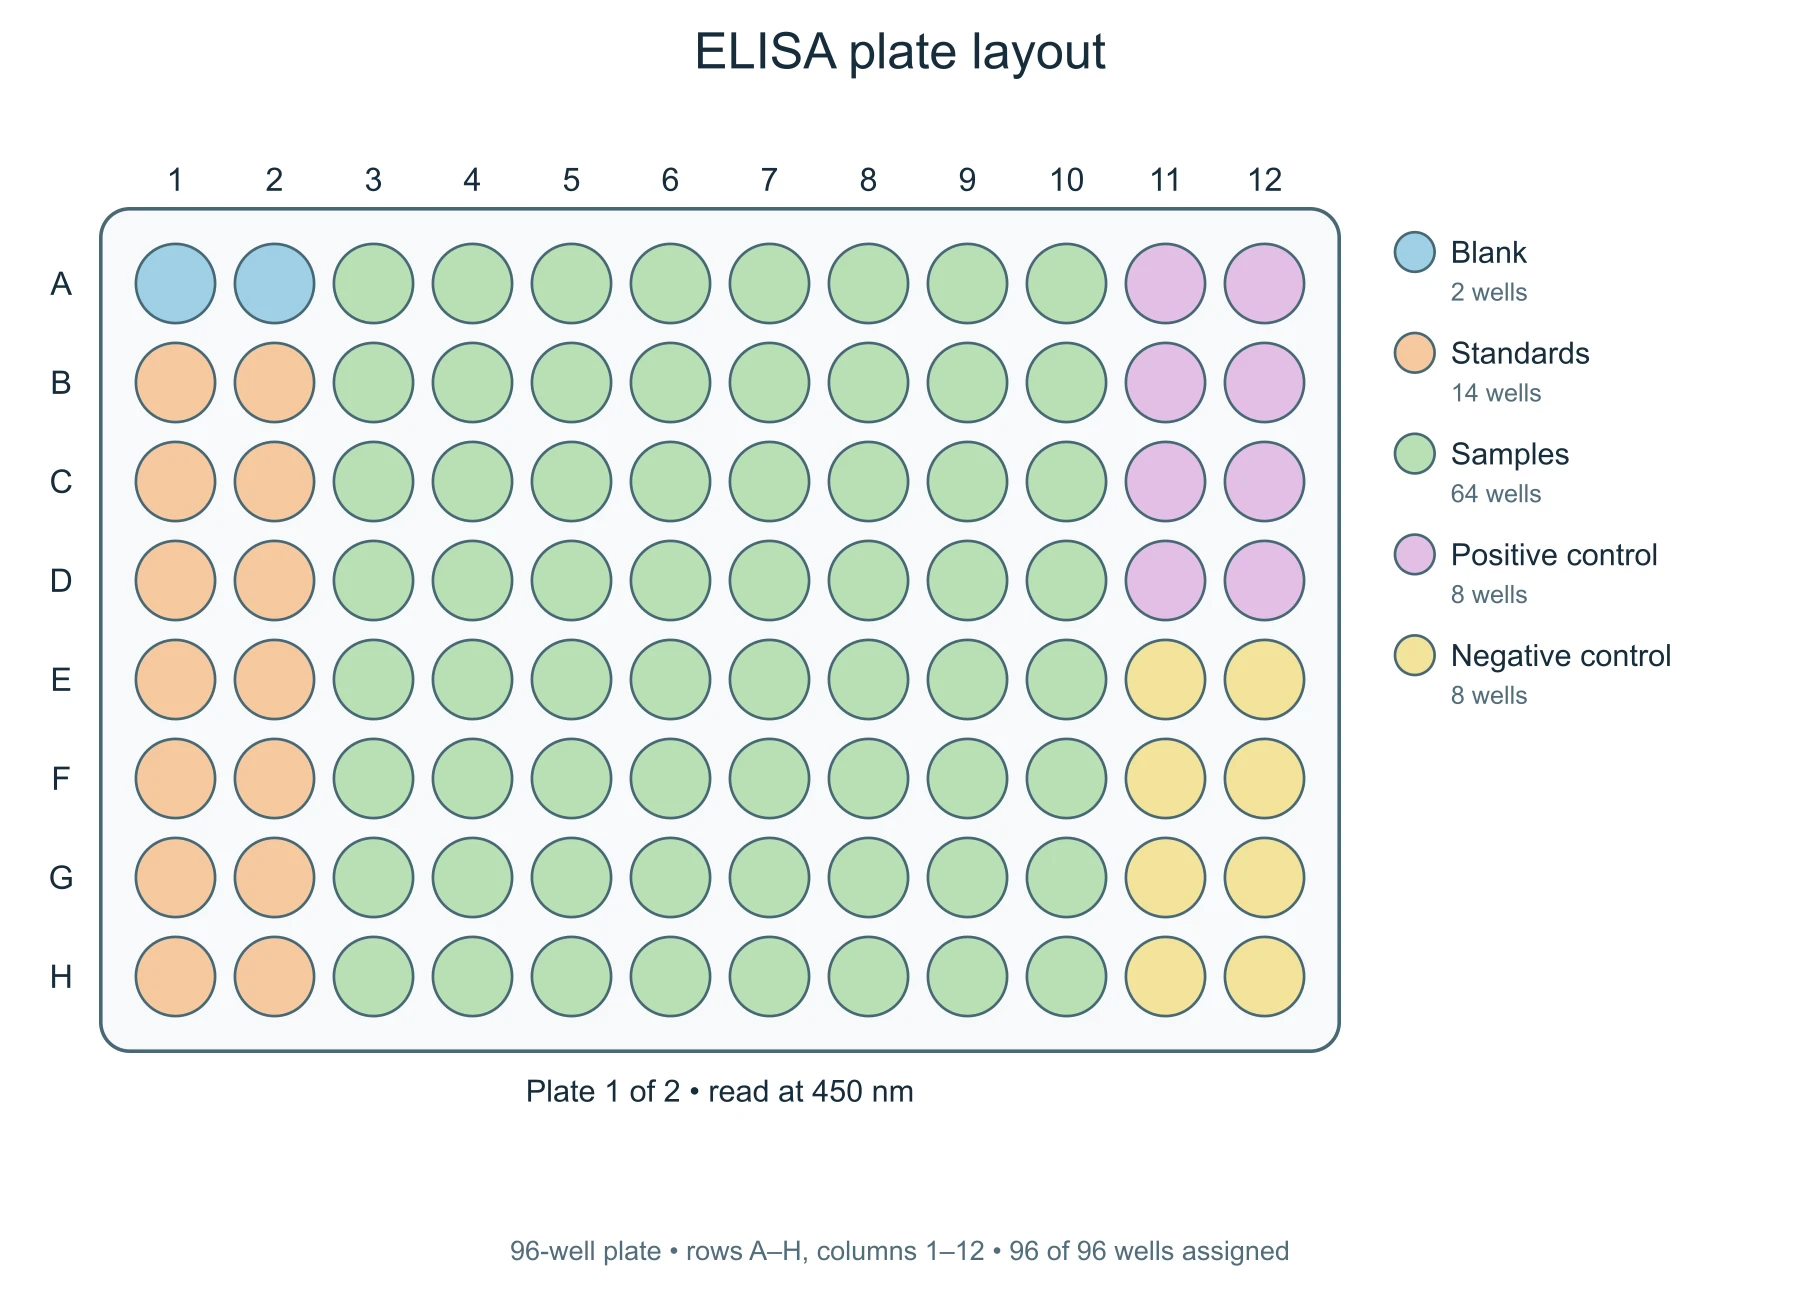
Example: ELISA layout with standards, samples and controls
The first example plans a sandwich ELISA on one plate. Wells A1 and A2 are blanks. The rest of columns 1 and 2, B1 to H2, holds seven standard concentrations in duplicate, which is fourteen wells. Columns 3 to 10 hold samples: sixty-four wells, enough for thirty-two samples in duplicate. The top half of columns 11 and 12 is the positive control and the bottom half is the negative control, eight wells each.
The legend counts add up to ninety-six, and the footer reports that all ninety-six wells are assigned. That check is the point of drawing the map before pipetting: if a count is not what you expected, the range is wrong. The map does not say which standard concentration goes in which row. Record that in your protocol or in the note under the plate.
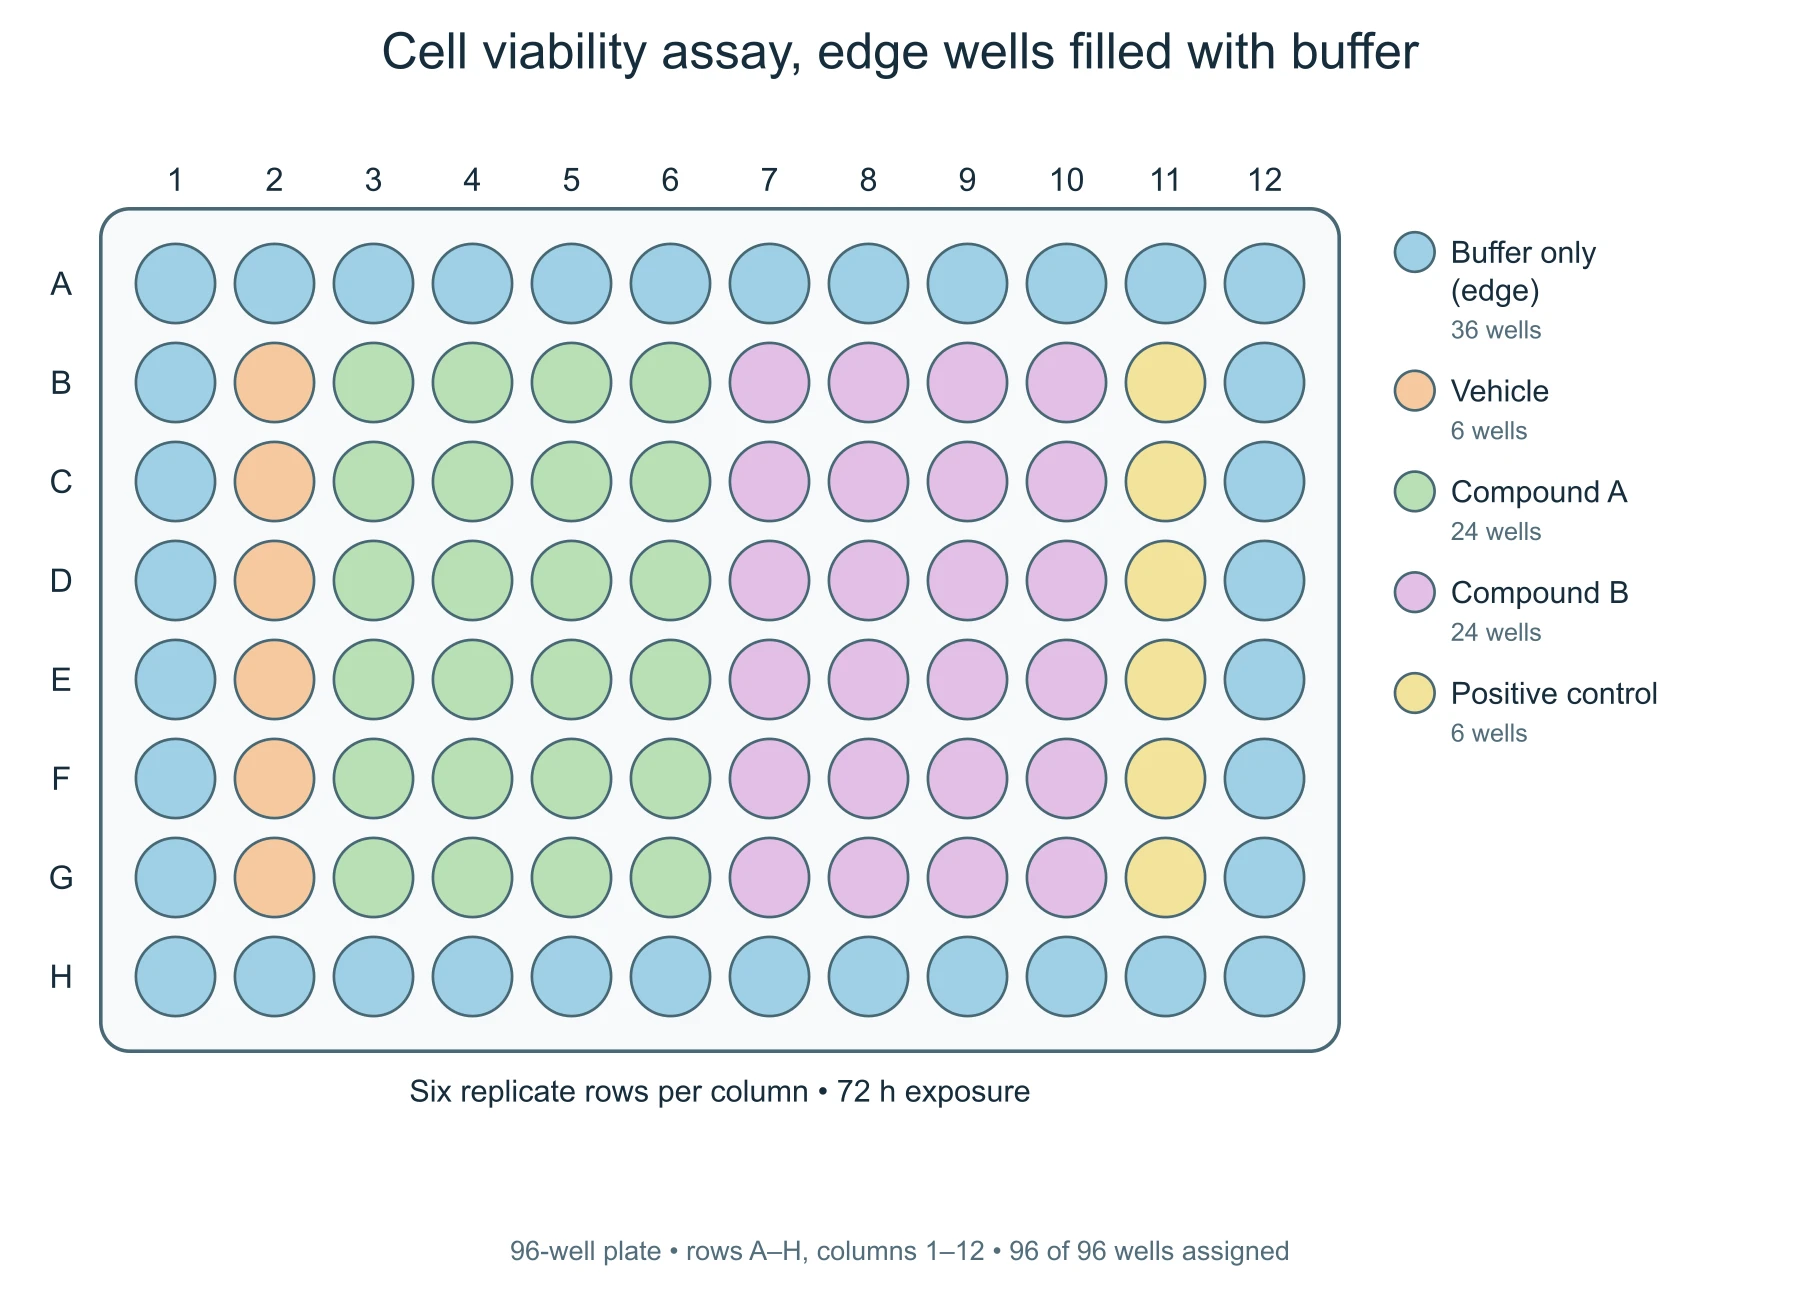
Example: cell viability assay with buffer in the edge wells
The second example leaves the outer ring of the plate out of the experiment. The thirty-six edge wells are filled with buffer only, a common precaution because outer wells can lose more liquid to evaporation during a long incubation than inner wells do. The sixty inner wells hold a vehicle column, four columns each for two compounds, and a positive control column, with six replicate rows per column.
The edge group is written as four ranges in one line: the top row, the bottom row and the two side columns without their corners. Because a well may appear only once, the side columns run from B to G rather than A to H. Whether edge wells need this treatment depends on your plate, lid, incubator and assay length; the layout shows the decision, it does not make it for you.
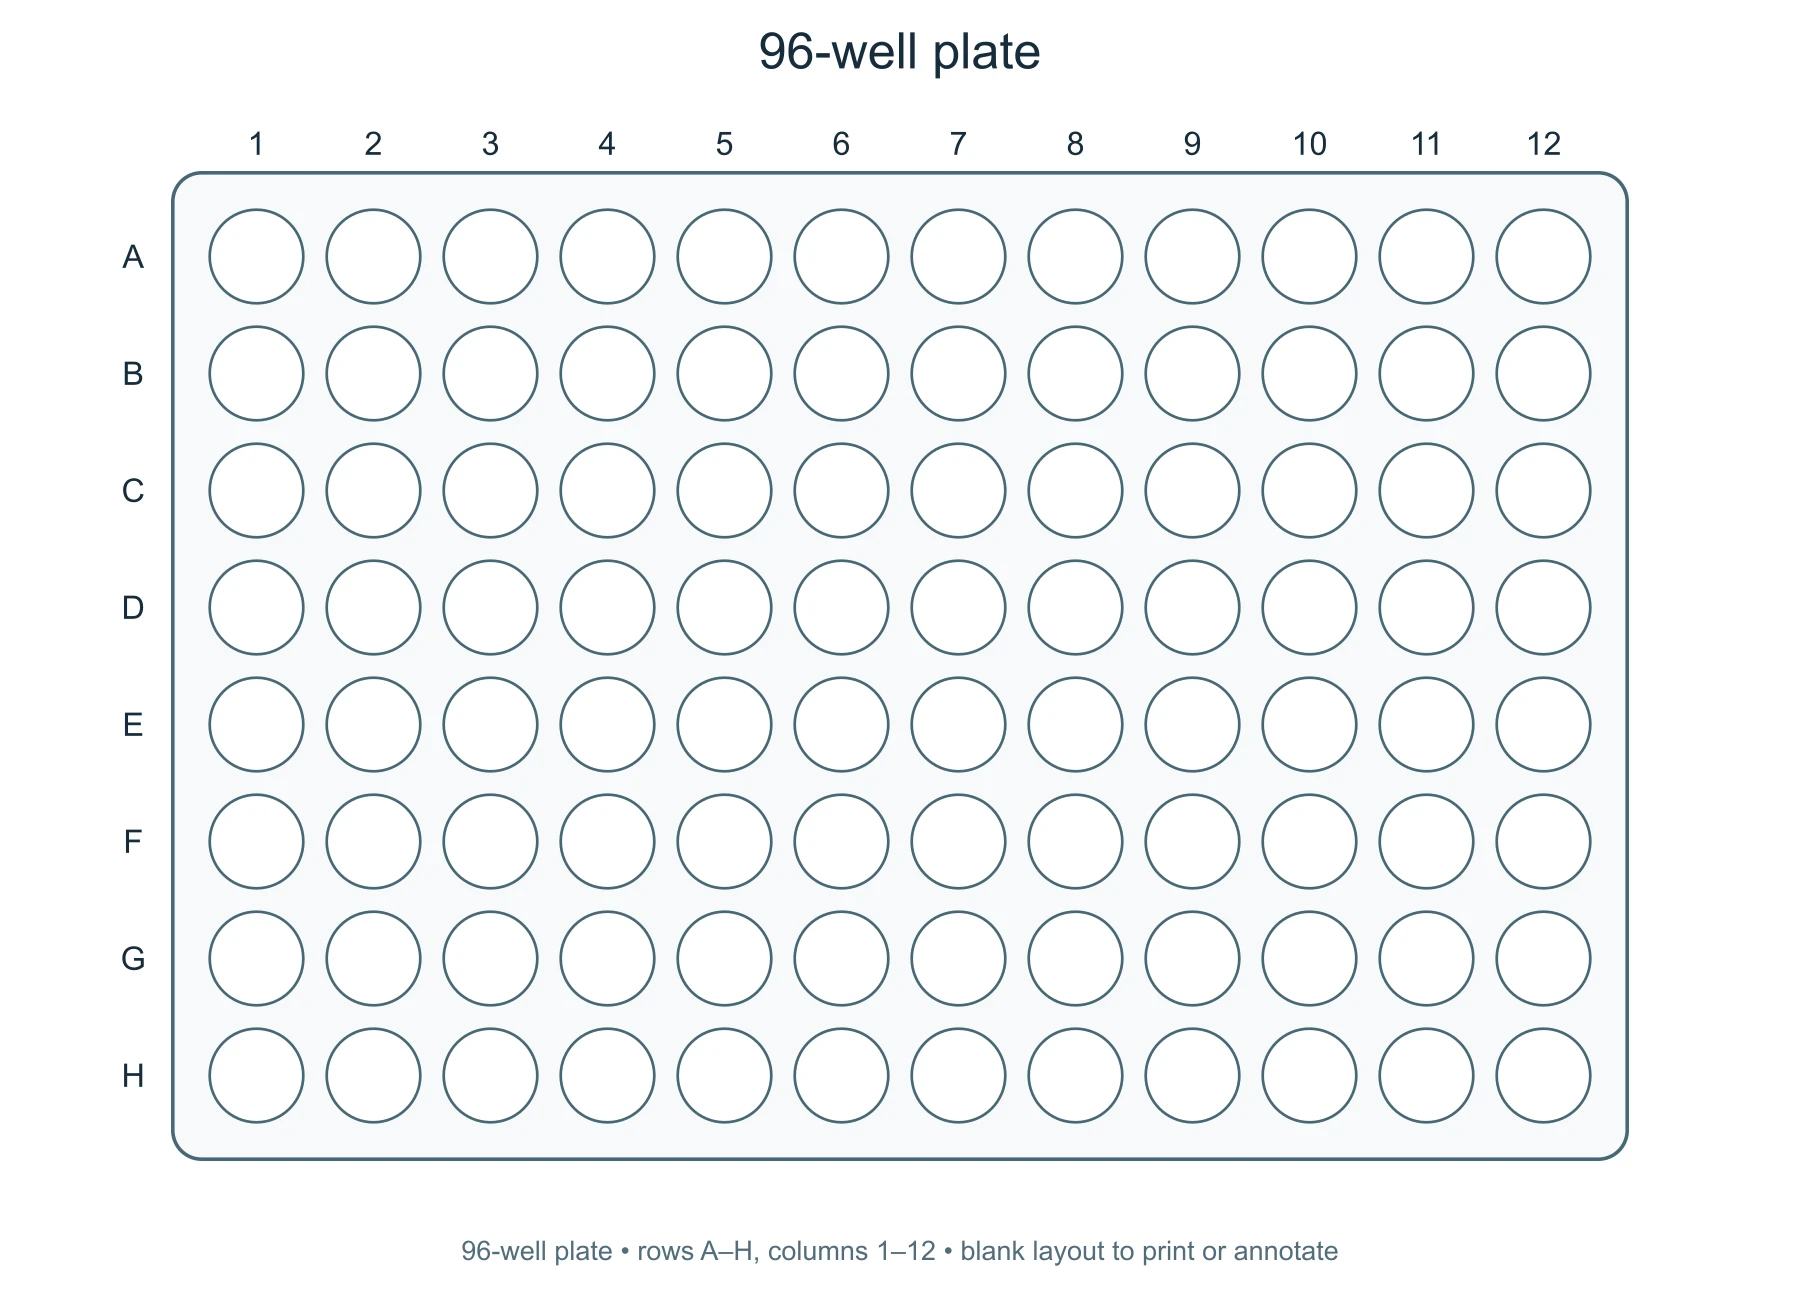
Example: blank 96 well plate to print
The third example is the blank template. With no groups the plate is drawn larger, the row letters and column numbers stay, and the footer states that it is a blank layout. Print it to sketch a plan at the bench, to note which wells were used on a partly filled plate, or to hand to a student before a first plate-based assay.
The drawing is a schematic, not a scale drawing. It is not sized to sit under a real plate as a pipetting guide, and the well diameter and spacing are not the manufacturer's dimensions. For anything that depends on physical dimensions, use the drawing supplied by the plate manufacturer.
Write well ranges the way plates are labeled
Rows are letters and columns are numbers, with A1 in the top left corner. A 96 well plate ends at H12, a 384 well plate at P24, a 24 well plate at D6. Lower-case letters are accepted and converted. A range can be written with a hyphen, an en dash or a colon, so A1-H2, A1–H2 and A1:H2 mean the same block.
A range is always a rectangle between two corners. For a group that is not a rectangle, list several ranges on the same line, separated by commas. A checkerboard or a fully randomized layout can be written well by well, but the line becomes long; for those designs a spreadsheet plate map is usually the better record and this page is better used for the summary figure.
Plan replicates and controls before you color anything
Decide the number of replicates first, because it fixes how many conditions fit. Ninety-six wells hold thirty-two conditions in triplicate or forty-eight in duplicate before any blank, standard or control is placed. Then reserve wells for the controls your assay needs, and only then place the samples.
Putting all replicates of a condition side by side is easy to pipette but ties the condition to one region of the plate. If position effects matter for your assay, spread replicates across the plate or randomize their positions and keep the randomization list with your data. The layout figure should show what was actually done, not the tidier plan you started with.
Choose a format and keep the labels short
The format menu changes only the grid. A 384 well plate has sixteen rows, A to P, and twenty-four columns, and its wells are drawn small; use it for an overview and keep the group labels short. The 6, 12, 24 and 48 well formats are drawn with large wells and suit cell culture plans.
Up to eight groups are allowed so that the legend stays readable and the colors remain distinguishable. A label can have forty characters and must fit on two legend lines. If you need more than eight groups, combine related conditions under one label and explain the detail in the figure caption or the note.
Use the export in a notebook, slide or methods figure
SVG keeps the plate as shapes and text, so you can change a color or font in Illustrator, Inkscape or PowerPoint. PNG is a fixed picture for a lab notebook entry or a message to a colleague. The colors are light fills with a dark outline so that the plate still reads when printed in grayscale, but a legend that relies on color alone is hard to follow in black and white; name the well ranges in the caption as well.
The exported file contains only what is visible: the title, the plate, the legend, the note and the footer line. It does not store volumes, concentrations, reagent lots or instrument settings. Keep those in your protocol, and treat the figure as a picture of the layout.
Questions about the 96 well plate template
Is this 96 well plate template free?
Yes. The editor runs in your browser, needs no account and uses no credits. SVG and PNG downloads are free.
How do I get a blank 96 well plate to print?
Leave the groups box empty and update the preview, or load the example and clear the box. Download the PNG and print it. The drawing is a schematic and is not at the physical scale of a plate.
How many wells are in each row and column?
A 96 well plate has eight rows, A to H, and twelve columns, 1 to 12. A 384 well plate has sixteen rows, A to P, and twenty-four columns. A 24 well plate has four rows and six columns.
Can I make a 384 well plate layout?
Yes. Choose 384 wells in the format menu and write ranges up to P24. The wells are small at that size, so the figure works best as an overview with a few large groups.
Can one well belong to two groups?
No. The editor stops and names the well and both groups. Assign each well once, or use a combined label such as "Sample + spike" for that well.
Does the page check my assay design?
No. It checks only that the wells exist on the selected plate and are not assigned twice. Replicate numbers, controls, volumes and edge-well handling remain your decisions.